I literally just got my iGuide Planix a few days ago and have only scanned one space with it so far (haven’t even processed it yet), so I’m a total noob.
One upcoming job is to scan a large high school theater building. I realize that with the sloped floor of both the main level and balcony, that the planar LIDAR scanner is not going to be seeing all the walls from all scan locations.
Any best practice ideas from those of you with more experience? Should I set the scanner higher than usual so it can see a bit further? Anything else?
You don’t need to see all of the walls from each scan location. As long as you have enough scans in each room so that the collective effort sees all walls, then you’re fine.
The above in my experience is the same. I would add a couple things based on the attached project which has the same technical challenges. I can relate to the noob comment. This was my first “real” job.
Over shoot a lot just to give you good info for aligning scans and the drafting all the info they need. Turn off the un-needed ones in Stitch.
This one I got caught out on - When shooting the balcony front edge make sure the laser has something to bounce back of that shows a defined edge. I my case the railing was low and not solid from about 2ft up. I had to shoot the images like I would in that scenario and then put my iGuide on a super low tripod to get scan data from the bottom solid section of the front rail.
This is a good example for point 1. Going up the rows of chairs make sure your scan spacing allows you to have scan data from the previous scan to align precisely.
This is incredibly helpful; thank you! I am not sure I would have thought of scanning low enough to get the edge of the balcony, but that sure is an important detail. How did you get those very low level scans to align with the others? So low down like that it will see the balcony railing wall, but no other surfaces that the higher scans would see, so how can it orient?
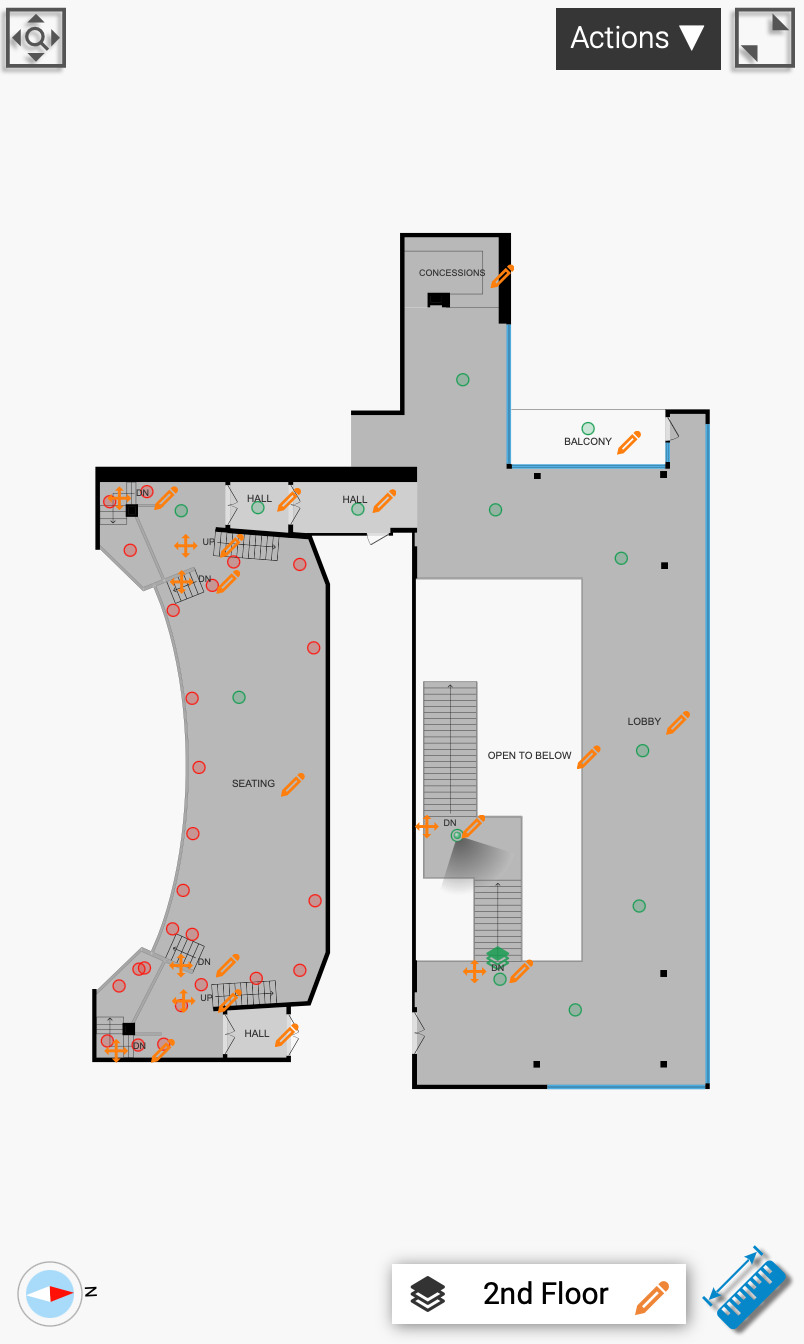
Used technique number 3 to make sure I had an anchor point. Instead of working your way up in this case I took extra scans as I moved down into that area. The attached screen shot can give you an idea of what this looked like. The orange dots are not visible to the view. The green dots are visible to the viewer. This is easier then it sounds. you just need to watch very carefully as your scanning that the important features (front rail on Balconey). If it is not distinct on the scan data you simply figure out a way to scan that area that will allow you to complete the puzzle. Hopefully this will help so you do not have to come back for a second visit:)