Horrendous Image Quality with Planix Pro

iGuide Planitar / Planix Pro - Image Quality Issues & Lack of Improvements

I’ve been raising concerns about iGuide’s image quality for over 2.5 years now, and frankly, I have seen zero improvements. In fact, it almost seems like the processed panorama displayed online is referencing the low-quality S1 JPG rather than the high-quality H1 JPG. The difference is obvious when you access the Blurring Tool, where the unstitched image appears significantly higher in quality compared to the grainy, low-resolution panoramas displayed in the final tour.

Key Issues:

  1. Poor Image Quality in Processed Tours – The final stitched panorama looks horrendous compared to the original high-quality images. Why is this happening?

  2. Blurring Tool Shows Higher Quality – This proves that the high-quality image exists but isn’t being used properly in the tour.

  3. ** Despite Stitch** being set up correctly with the proper presets, it always auto-stitches and edits the photos, despite my settings & countless advise from Planitar employees, Stitch completely ignores my settings; It automatically applies contrast, brightness, and other adjustments on top, forcing me to manually reset every single image and reapply my own presets—every single time.**

I’ve attached two screenshots as proof:

First image : The final processed panorama (low quality, grainy, unacceptable) .

Second image : The blurring tool view (higher resolution, noticeably better quality even before stitching) .

So my question is: Why is the final output so terrible?

At this point, iGuide is pricing itself out of relevance while continuing to ignore basic quality issues. Instead of fixing critical problems, we’re stuck paying outrageous fees for outdated technology. If iGuide and Planitar don’t improve immediately, they’ll be replaced by companies offering better quality, better pricing, and better tools.

Does anyone else have similar frustrations with iGuide’s image processing?


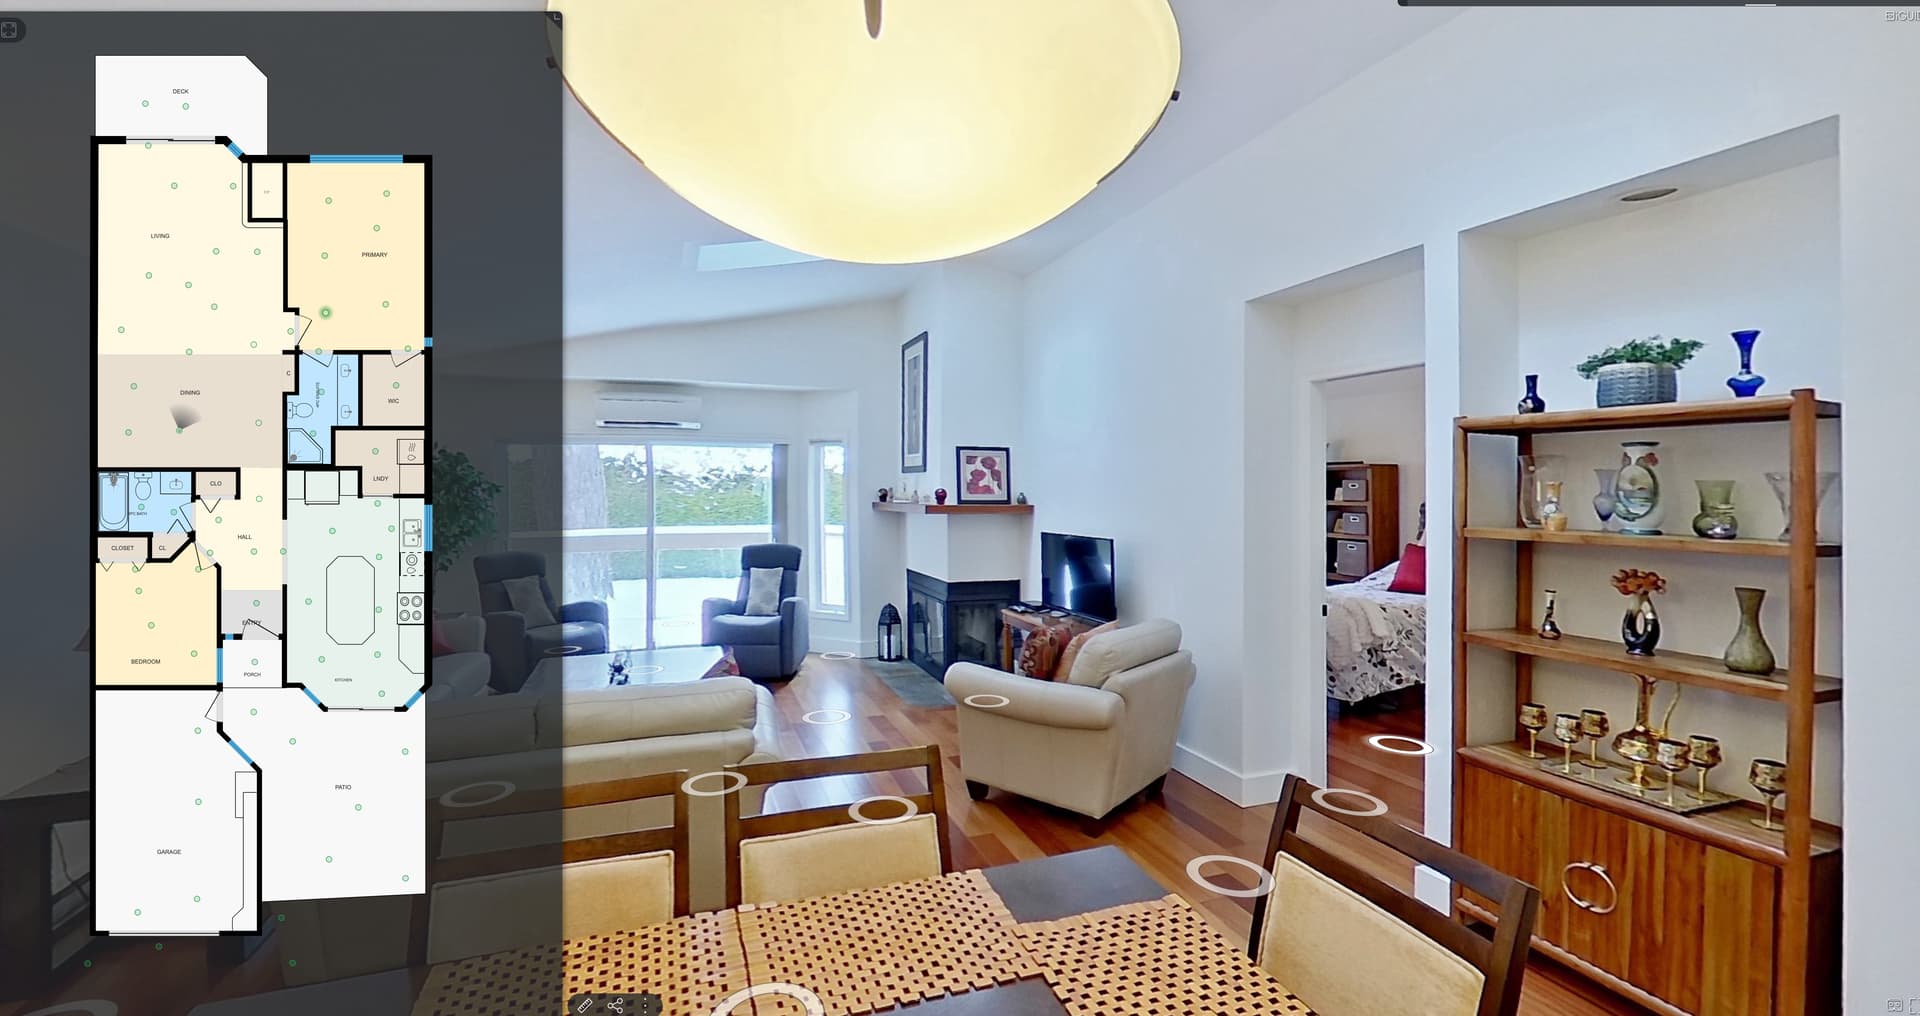
Notice the grain, noise, and artifacts in the shadows and areas like the walls and ceilings. There is horrendous blooming on the windows, with fringing & colour cast.

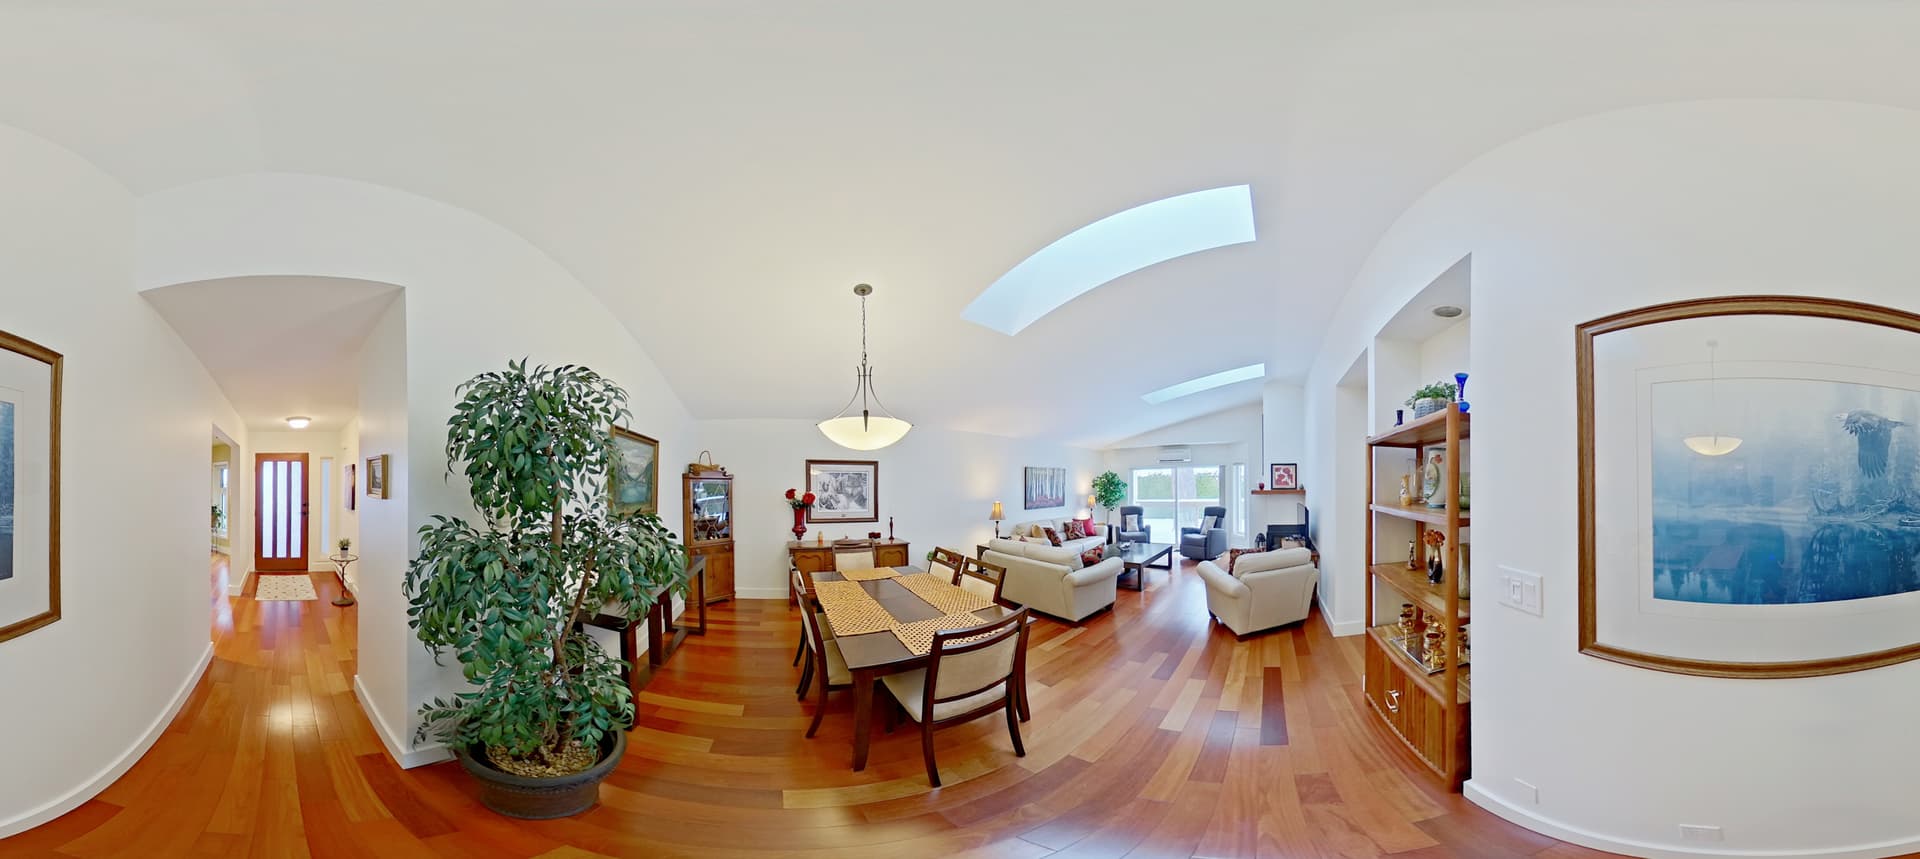
This is the obviously stretched pano, in the blur tool; clearly you can see this is the HIGH res version, and the image being displayed in the iGuide for each panorama is likely the s1.jpg or the low quality version.

Why does Planitar force this behavior? Why is the image quality so terrible? I have tried everything in these forums, from resetting everything, firmware, employee suggestions, you name it. There is an issue that needs to be rectified.

2 Likes

One thing I don’t understand is that the scans from the usb drive are 6720x3360 pixels and 300 DPI.
Then under replace pano images after your iGuide is completed. The downloaded pano image is now 7200x3600 pixels and 96 DPI. Plus the image colours and brightness are adjusted again after the iGuide is complete.

So I can see your frustrations there.

I was actually about to create a post to ask everyone’s camera settings on Planix Pro system, specifically because the photos and tours both look pretty grainy now, to say the least. Is Ricoh External still sufficient as it used to be?

2 Likes

On that topic, here’s something I’ve noted as well. It seems that adjustments made using the Wizard in Stitch aren’t saved to the original file. At least not the h1 file. I would make the colour adjustments and create the tour, only to realize I’d forgotten to photoshop or some other process. So I go back into the h1 pano to make the adjustments, but when I go to replace the pano the colour is WAY off again and looks horrible in the tour coming from the previous pano. I’ve even tried running reloading that pano in Stitch and using the Wizard on it but it just doesn’t process it (in the tour) anymore. Unless I’m doing something wrong.

2 Likes

Hi AudioGeek,

I do see the difference in the two examples you show. I opened up a couple recent iGuides of my own to see if I could duplicate that difference and I was unable to see it. I had the finished iGuide open in my web browser and I was in the “wizard” tool in Stitch on the same pano. They did look the same for me. I noticed in your examples that it was two different panos being compared, but I don’t think that explains the difference in your images.

I wonder about your workflow. Do you do any editing of the panos outside of Stitch? I think Anderson_Ramjohn may be on to something about the adjustments not being saved in the h1 pano or reflected in the saved pano. Perhaps Stitch works like LR and is non destructive(?). To me this means the adjustments are saved separately from the image itself, and are only seen when viewed through the software (in this case Stitch). If that is the case your workflow, if it contains outside editing software, may play a part.

If it helps I will share my workflow. I open the iGuide with Stitch and allow Stitch to apply all it’s own auto adjustments. It does brighten the image, apply contrast, etc. as you described. I have then set it up to apply my own custom preset within Stitch. Stitch presets do not start from a blank reset image, but are applied on top of the adjustments already made (in this case all the auto adjustments). My preset is mostly about improving the colour. My preset is as follows:
Blue slider: -10
Yellow slider: -30
Saturation: -4
Clarity: +1

I capture all my interior images with the -5/+2 hdr setting. For the outside panos I use the Ricoh native hdr setting.

At this point I go through every image individually and adjust a bit further. If there is a lot of colour cast I will reduce the blue or yellow even further than I did with the preset. For my exterior images I tend to increase the contrast and bump the saturation back up a bit.

I hope this helps a bit. I can share my own examples if you like. I do agree the overall image quality isn’t as good as the old IMS-5 camera. The first time I used the Planix Pro I was devastated by the poor quality. After I figured out a preset, and especially after the custom hdr settings were added, it became much closer to the old camera.

1 Like

Thank you for sharing your detailed feedback with us and understand the final output may not have met your expectations. We recognize the importance of image quality in your work and appreciate the time you invest in achieving the best results.

From what you’ve shared, it sounds like presets might be playing a role in the issue you’re facing. I’d like to share an article from our Help Centre that explains Stitch Presets in detail. It could help clarify and guide you toward a solution.

We find that image quality can be influenced by many factors, and we’d like to better understand your specific situation to address the issue effectively; particularly by reviewing the iGUIDE in question.

Please reach out to our Support Team and we’ll be happy to assist further.

iGUIDE Support
Create a Support Ticket
Phone: 1 (855) 505-1723 or 1(226) 546-1723
Hours: Mon-Sat, 8:00AM – 6:30PM EST

Can you send me your workflow

Thank you for sharing your presets! Question - if you’re providing a 3D tour, and the client doesn’t want the HDR photos, are you still using the -5/+2 hdr setting?

I only use the -5/+2 on the images I know will be part of the 3D Tour. That setting is slow, so I turn off hdr when measuring closets, etc. The Ricoh external hdr is much faster even.

1 Like

Absolutely! I did a tour like that recently, with turning it off for closets etc, but yes it’s relatively super slow compared to Ricoh external only. For me it adds about 20 seconds per shot and that adds up fast. Wondering if it’s worth it if it’s the tour only without the HDR photos. The tour, in Ricoh external is pretty grainy looking, imo, but if they’re getting professional photos anyway maybe it’s not too critical? Buyers may focus mainly on the photos, and use the tour as a secondary tool? Maybe it’s time for the R1 upgrade?